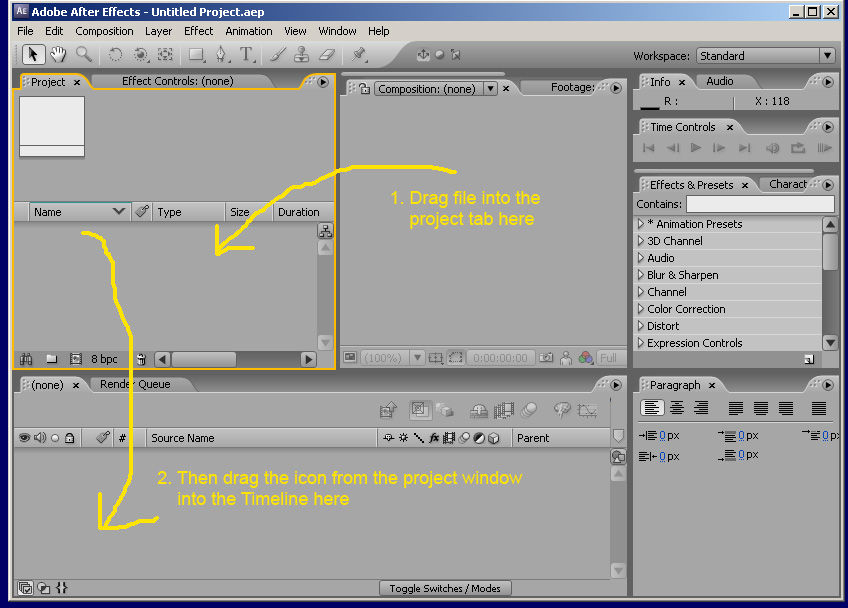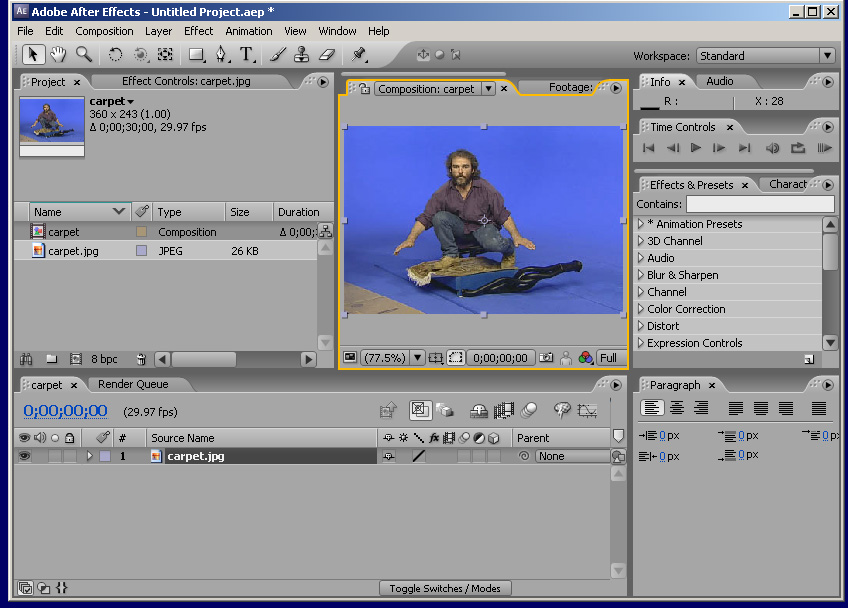
The easiest way is to drag the file to the Project tab -- the icon for the file appears -- then drag this icon to the Timeline below.
A new composition icon appears in the Project tab and the file appears in the view window.
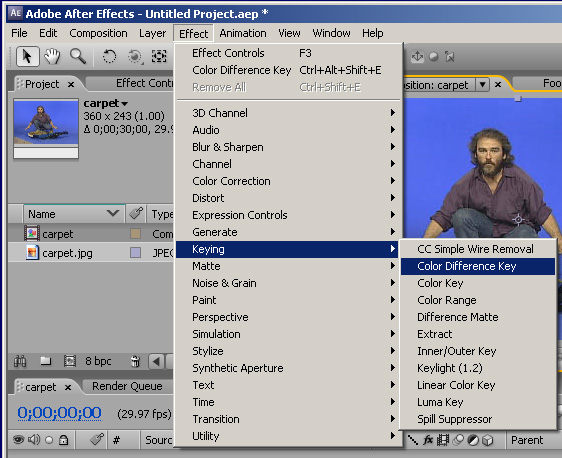
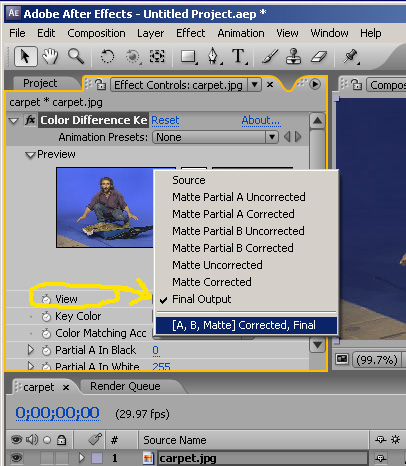
3) Now extract a key from the blue screen
Choose Effect->Keying->Color Difference Key.
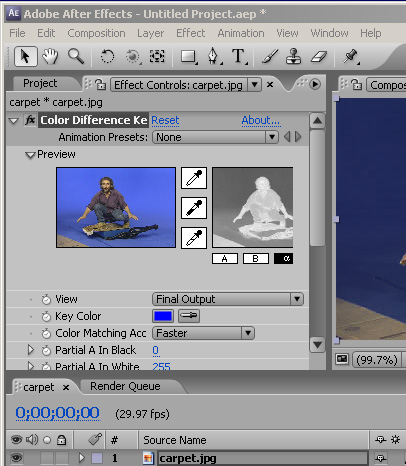
Where the Project tab was, the controls for the Color Difference Key tool now appear.
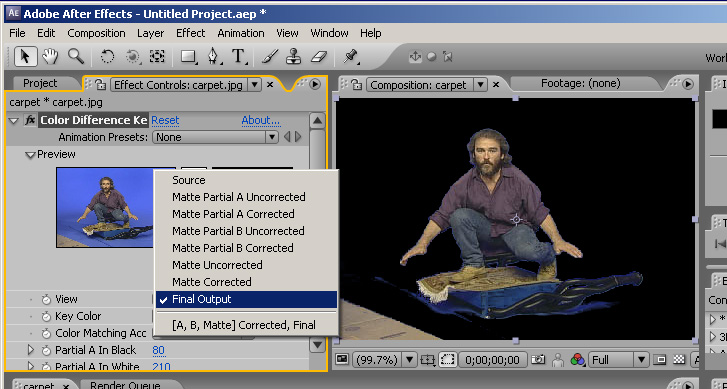
First, change the view to show all parts of the key -- the red channel, the blue channel, the resulting matte, and the final result of the image with the matte applied.
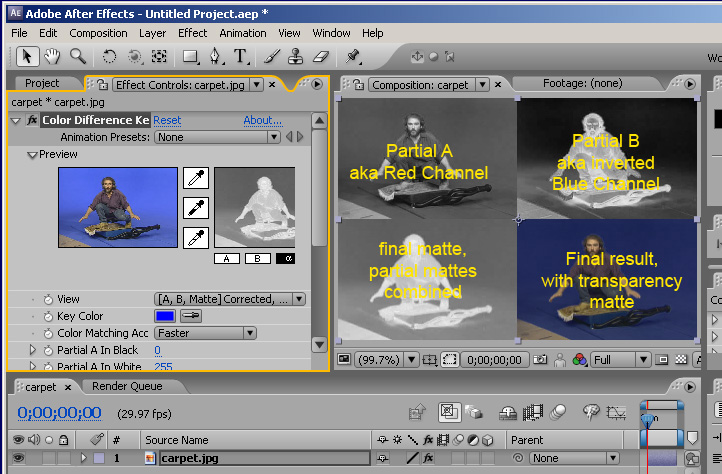
These are called "Partial A", "Partial B", "Matte" and "Final" respectively.
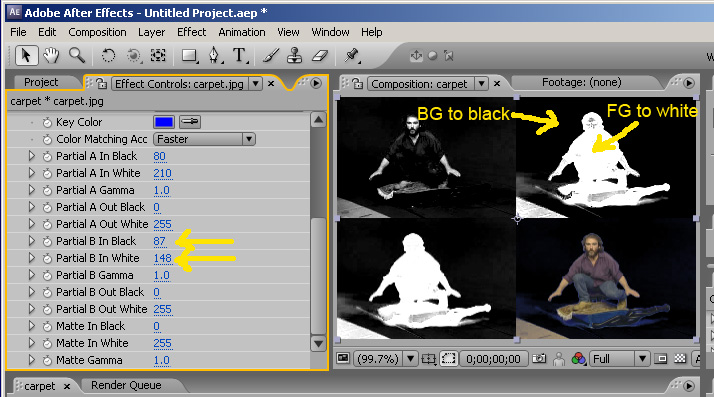
4) Now extract a key from the blue screen
Scroll the controls down. Note the controls for each partial matte, and the final matte.
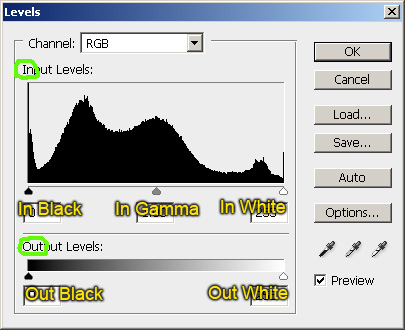
These settings correspond directly to the Levels tool in Photoshop.
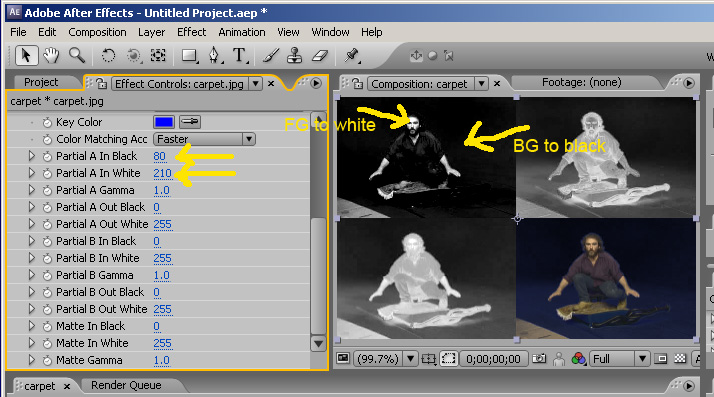
So adjust the Partial A (Red Channel) In Black control so that the background goes to black.
Also adjust the Partial A (Red Channel) In White control so that the foreground goes to white.
Do the same for Partial B (Blue Channel)
You can see how the red channel corrects for the white areas in the inverted blue channel.
With them both combined, the matte is essentially complete
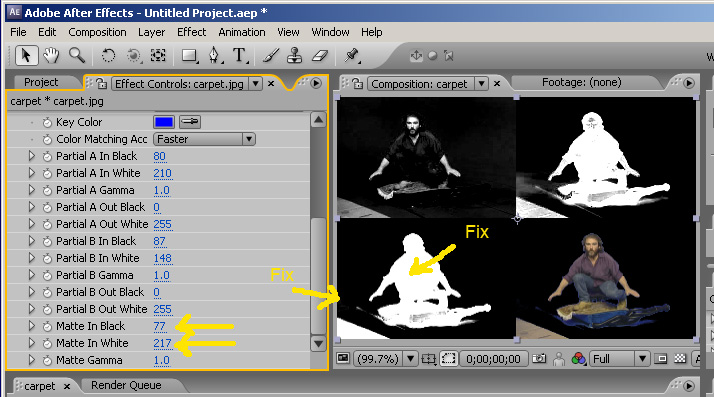
Now for a little tweek on the Matte
5) Done! See your work!!
Change the view back to the Final Result
Add a background if you feel like it!
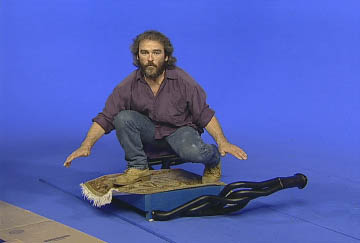
The final result looks pretty good!Keep in mind that this technique was originally developed for *film*!! How did they adjust the white and black areas in film? They certainly didn't have sliders!!
The way they did it is amazing and laborius! To separate the blue channel, they exposed the color film through a blue filter onto B&W, high contrast film. To create the red channel, they did the same with a red filter, then contact-printed a strip to create the inverted red channel.
To darken the dark areas, they over-exposed the film -- the exposed areas caused the silver oxide to adhere to the film.
To lighten the white areas, they over-processed the film -- the longer the film was processed in the developer chemicals the more silver oxide dissolved from the film, leaving more clear areas.
The timing of both steps was *critical*, and was different from shot to shot -- you can try a different blue screen image yourself, and see that the white and black settings will be different.
So the red channel and blue channel would be the inverse of what we did here. The background areas would be white, adn the foreground character would be black. When these two strips of film were run together, the silver oxide on both strips together blocked the light, and the clear areas in both allowed light to pass, and another strip of high-contrast B&W film was exposed to make the foreground-positive matte. The contra-matte, for the background, was a simple matter of making a negative of the foreground-positive matte. The resulting two film strips each had a matte that exactly fit eachother, reducing the matte line around the characters.
The process must have been painstaking and tedious, and very time consuming, not to mention how much film was destroyed just making negatives and positives, plus testing different exposure times and processing times! Truly an amazing special effect for film!